Author: Shawn Vieth

  • What to Plant in May: Simple Herbs, Flowers, and Garden Additions for a More Beautiful Outdoor Space

    What to Plant in May: Simple Herbs, Flowers, and Garden Additions for a More Beautiful Outdoor Space

    May is one of the most exciting months in the garden.

    After a long Wisconsin winter, the soil is warming up, plants are waking up, and outdoor spaces start to feel alive again. This is the time of year when even a few simple additions can make a big difference — whether you have a full garden, a few containers, a front porch, or a small sunny corner by the house.

    If you’re wondering what to plant in May, here are a few easy ideas to help bring more color, texture, fragrance, and life into your outdoor spaces.

    1. Add Herbs for Beauty, Fragrance, and Everyday Use

    Herbs are one of my favorite things to plant in May because they are both practical and beautiful.

    Many herbs are useful in the kitchen, but they can also add wonderful texture, fragrance, and interest to garden beds and containers. Some herbs are also beautiful enough to tuck into flower gardens or to use in cut-flower arrangements.

    A few herbs to consider planting in May include:

    Basil
     Basil loves warm weather and is a great addition to containers, raised beds, and vegetable gardens. Dark opal basil (love, love, love) is especially beautiful because of its deep purple foliage and can also be used as a striking filler in bouquets.

    Mint
     Mint is fragrant, useful, and easy to grow, but it does spread quickly. I usually recommend planting mint in a container so it can be enjoyed without taking over the garden.

    Thyme
     Thyme is a low-growing herb that works beautifully along edges, in containers, or tucked into sunny garden spaces. It adds a soft, tidy texture to the landscape while being useful in cooking and baking.

    Sage
     Sage has beautiful silvery foliage that adds contrast to garden beds and containers. It pairs nicely with both flowering plants and other herbs.

    Rosemary
     Rosemary is a wonderful container herb with a clean, classic fragrance. In Wisconsin, it is usually treated as an annual unless overwintered indoors.

    Herbs are a simple way to make a garden feel more interactive. You can brush past them, smell them, harvest from them, and enjoy them all season long.

    2. Plant Annual Flowers for Fast Color

    May is also a great time to start adding annual flowers, especially once the danger of frost has passed.

    Annual flowers are the plants that bring a lot of color quickly. They are perfect for containers, porch pots, garden edges, and empty spaces that need a little life.

    Some great annual flowers to plant in May include:

    Zinnias
     Zinnias are cheerful, colorful, and wonderful for cutting. They love warmth and sunshine, and they keep producing flowers through the summer.

    Celosia
     Celosia adds bold texture and unique color to the garden. It also works beautifully in bouquets and dried arrangements.

    Snapdragons
     Snapdragons add height and charm to spring and early summer gardens. They are especially pretty in cottage-style plantings and containers.

    Marigolds
     Marigolds are bright, sturdy, and easy to grow. They work well in vegetable gardens, containers, and sunny borders.

    Cosmos
     Cosmos have a light, airy look and bring movement to the garden. They are beautiful in cut flower gardens and informal plantings.

    Annuals are a great choice if you want a quick refresh. Even one container near a doorway or one colorful grouping near a walkway can make a space feel more welcoming.

    3. Use Containers to Add Color Where You Need It Most

    You do not need a large garden to enjoy seasonal plants.

    Containers are one of the easiest ways to add life to a porch, patio, driveway, front step, or small outdoor area. They are also a good option if you are not ready to commit to planting a full garden bed or want to have a portable option.

    A simple May container combination could include:

    • One taller plant for height
    • One or two flowering plants for color
    • One trailing plant to soften the edges
    • One herb for fragrance or texture

    For example, you could combine basil, marigolds, trailing foliage, and a colorful annual flower for a container that feels both pretty and useful.

    Containers are also easy to change throughout the season. You can start with spring plants, transition into summer color, and then refresh again in fall.

    4. Fill Empty Garden Spaces with Seasonal Color

    May is a good time to walk around your yard and notice where things feel a little bare.

    Maybe the front walkway needs more color. Maybe a patio corner feels empty. Maybe a garden bed has a gap where spring bulbs have finished blooming. These small spaces are perfect for adding annual flowers, herbs, or a few perennials.

    You do not always need a major landscape project to make your yard feel better. Sometimes, a few thoughtful additions can completely change how a space feels.

    Look for areas where you could add:

    • A small grouping of flowers
    • A container near an entryway
    • Herbs near a patio or kitchen door
    • A few taller plants for height
    • A soft edge along a walkway
    • A pop of color near a sitting area

    The goal is to make the space feel cared for, welcoming, and alive.

    5. Think About Texture, Not Just Flowers

    When planting in May, it is easy to focus only on blooms. Flowers are wonderful, of course, but foliage and texture are what make a planting feel full and interesting.

    Herbs are especially useful for this because they often have beautiful leaves. Basil, sage, thyme, mint, and rosemary all bring different textures and colors to the garden.

    You can also mix plants with:

    • Fine, airy foliage
    • Broad leaves
    • Upright growth
    • Trailing stems
    • Soft silver tones
    • Deep green or purple leaves

    When you mix textures, even a simple planting looks more intentional.

    6. Add Plants That Invite You Outside

    One of the best reasons to plant in May is that it makes you want to spend more time outdoors.

    A few pots by the porch, herbs near the patio, or flowers along a walkway can make everyday spaces feel more enjoyable. Your garden does not have to be perfect to be beautiful. It just needs to feel alive, useful, and connected to the season.

    May is a great time to start small and build from there.

    Add a few herbs. Plant a container. Tuck in some flowers. Refresh one corner of the yard. These little changes add up quickly and can make your outdoor spaces feel much more inviting.

  • What a Spring Landscape Cleanup Really Includes (and When It Makes Sense to Start)

    What a Spring Landscape Cleanup Really Includes (and When It Makes Sense to Start)

    Early spring always brings a mix of excitement and uncertainty. The snow starts to melt, days feel longer, and it’s tempting to get outside and start clearing everything away as soon as possible.

    But when it comes to early spring cleanup, timing matters — and not everything should be done all at once.

    Each March, I have conversations with clients who are wondering what to tackle early, what to wait on, and how the weather plays into it all. This post is meant to help clarify what early spring cleanup actually includes, and when it’s best to begin.

    Why Early Spring Cleanup Isn’t One Single Task

    Spring cleanup isn’t a single event — it’s a process that unfolds as conditions allow.

    In our climate, March can bring frozen ground one week and muddy soil the next. That means landscape work needs to be flexible and thoughtful to avoid damaging plants or soil.

    Early spring cleanup focuses on preparation, not perfection.

    What Early Spring Cleanup Typically Includes

    There are several tasks that can often be done in early spring, depending on weather and site conditions.

    Shrub and Small Tree Pruning

    Late winter into early spring is often an ideal time to prune many shrubs and small trees, as long as temperatures are above freezing and plants haven’t started to leaf out.

    Pruning during this window:

    • Improves plant structure
    • Encourages healthy growth
    • Removes winter-damaged branches

    This work is best done carefully and intentionally, rather than rushed.

    Selective Debris Removal

    Early spring cleanup usually involves removing:

    • Fallen branches
    • Large debris
    • Excess leaf buildup in key areas

    At this stage, cleanup is more about clearing what needs to be cleared — not stripping beds bare.

    Leaving some organic material in place can actually help protect soil and emerging plants.

    Assessing Winter Damage

    March is also the time to evaluate:

    • Snow and ice damage
    • Broken limbs
    • Areas of compaction or drainage issues

    This assessment helps guide what work should happen later in the spring and what might be better addressed over the growing season.

    What Often Should Wait Until Later

    Just as important as knowing what to do early is knowing what to hold off on.

    Perennial Cutbacks

    While it can be tempting to cut everything down right away, many perennials benefit from waiting until temperatures are consistently warmer.

    Leaving stems in place a little longer:

    • Protects new growth
    • Provides habitat for beneficial insects
    • Reduces stress on plants

    Heavy Raking or Bed Disturbance

    Working soil too early — especially when it’s wet — can cause compaction and long-term damage.

    In many cases, it’s better to wait until the ground has dried slightly and stabilized.

    Full-Scale Cleanup

    Early spring is about starting, not finishing.

    A more thorough cleanup often makes sense later in spring, once growth patterns are clearer and conditions are more predictable.

    How I Decide When to Begin Cleanup Work Each Year

    Each season is different, but before starting early spring cleanup, I consider:

    • Are temperatures consistently above freezing?
    • Is the ground firm enough to work without compaction?
    • Have plants begun active growth yet?
    • Will this work benefit the plants now—or later?

    If the conditions aren’t right, waiting is often the best choice.

    A Note for Homeowners and Gardeners

    If you’re unsure whether it’s time to start cleanup in your landscape, that’s completely normal.

    Early spring can feel unpredictable, and it’s better to move slowly than to undo progress later. Starting with pruning and light cleanup — and letting the rest unfold naturally — often leads to healthier landscapes overall.

    Final Thoughts

    Early spring cleanup is less about checking everything off a list and more about setting the stage for the growing season ahead.

    By working with the weather and the plants — rather than against them — landscapes are better prepared to thrive once spring fully arrives.

    If you’re unsure about timing or want help planning early spring work, thoughtful planning now can make the rest of the season smoother and more enjoyable.

  • Starting Flowers from Seed: What’s Worth It (and What’s Not)

    Starting Flowers from Seed: What’s Worth It (and What’s Not)

    February is when seed catalogs pile up, trays come out of storage, and optimism runs high. It’s also when many gardeners ask the same question:

    Is it actually worth starting flowers from seed — or should I just buy plants later?

    The honest answer is: it depends.

    After years of starting flowers from seed for both landscapes and cutting gardens, I’ve learned that some plants are absolutely worth the time and effort — and others are better left to nature, direct sowing, or buying as starts.

    Here’s how I think about it.

    Why I Start Flowers from Seed at All

    Starting flowers from seed isn’t about saving money or rushing spring. For me, it’s about:

    • Growing varieties that aren’t available as starts
    • Controlling bloom timing
    • Producing healthier, more resilient plants
    • Creating a wider range of colors, forms, and textures

    That said, not every flower earns a spot under grow lights in February.

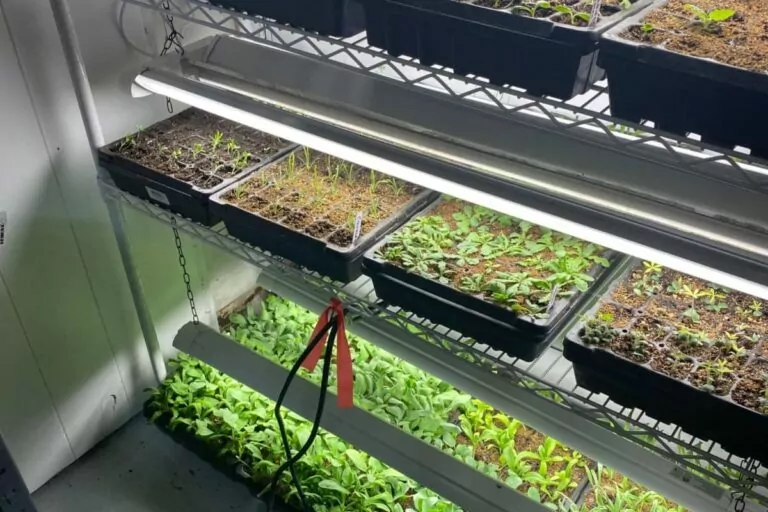
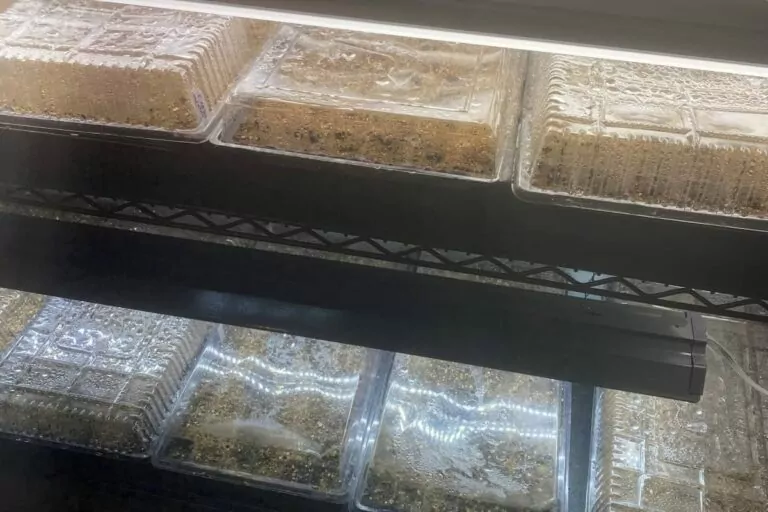
    Starting seeds

    Flowers That Are Worth Starting from Seed

    These are the plants I consistently find worth the effort.

    1. Slow-growing or long-season flowers

    Some flowers need a long head start to bloom well in our climate. Starting them indoors allows them to mature on schedule instead of running out of time.

    Examples:

    • Lisianthus
    • Bells of Ireland
    • Certain perennials

    2. Flowers you want in specific colors or varieties

    Seed starting opens the door to varieties you won’t find at garden centers — softer tones, unusual shapes, or specialty cuts.

    This is especially important for:

    • Cutting gardens
    • Bouquet planning
    • Color-themed plantings

    When I’m planning flowers for the cart, seed starting gives me flexibility and consistency.

    3. Perennials grown for the long term

    Starting perennials from seed requires patience, but it pays off.

    While not all will bloom the first year, many establish stronger root systems early and perform better in the long term. Some — like yarrow — may even surprise you with first-season blooms.

    Flowers That Aren’t Always Worth Starting Indoors

    This is where people often overdo it.

    1. Fast-growing, direct-sow flowers

    For some flowers, starting them indoors provides little benefit because they grow so fast. This is unless, as in my situation, you need them ready by a specific date.

    Examples:

    • Cosmos
    • Zinnias
    • Sunflowers

    These thrive when sown directly outdoors once conditions are right.

    2. Plants that dislike transplanting

    Certain flowers resent being disturbed and perform better when planted exactly where they’ll grow.

    If a plant struggles after transplanting, indoor seed starting can actually set it back.

    3. Flowers that need special germination conditions

    Some seeds require very specific temperature or light conditions that can be tricky indoors — especially for beginners.

    I often recommend leaving these for later or gaining experience with easier plants first.

    Starting seeds

    How I Decide What to Start Each Year

    Before I sow anything, I ask myself a few questions:

    • Does this plant need a long growing season?
    • Will starting it indoors improve bloom quality or timing?
    • Is it difficult to find as a healthy start locally?
    • Does it transplant well?

    If the answer is no to most of these, it probably doesn’t belong under lights in February.


    A Note for New Seed Starters

    If you’re just getting started with seed starting, you don’t need to do everything at once.

    Start with:

    • A few reliable varieties
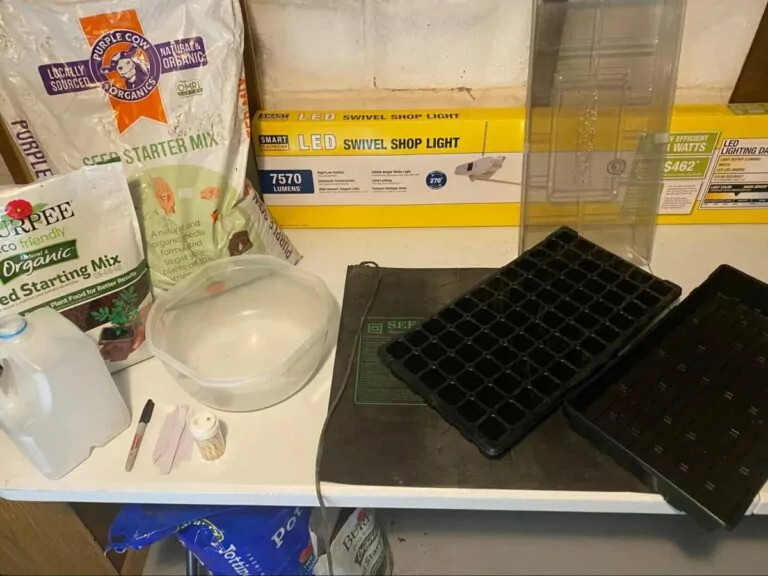
    • Clean trays and fresh seed-starting mix
    • Patience (and labels — always labels)

    I’ve shared a detailed, step-by-step look at how I physically start seeds — from trays and soil to heat mats and labeling — in a separate post if you’d like a closer look at the process:

    https://www.shawnlvieth.com/stepstoseedstarting/

    Final Thoughts

    Seed starting is part science, part intuition, and part experience. It’s not about doing more — it’s about doing what makes sense for the plants, the season, and your goals.

    Whether you’re growing for beauty, bouquets, or curiosity, choosing what’s truly worth starting from seed makes the whole process more enjoyable — and far more successful.

    Spring is closer than it looks.


    If you enjoy behind-the-scenes looks at how I plan and grow flowers for the season, you can sign up for my weekly emails here: http://eepurl.com/iFYfi6

  • What Makes Dried Flowers so Special? 

    What Makes Dried Flowers so Special? 

    Dried flowers, also known as everlasting flowers, capture the fleeting beauty of fresh flowers. 

    They are known to last months and often years. No need for fresh water here! They require no cleaning of vases or fresh water.  

    Talk about sustainability. These fit the bill. If you do tire of them, you can add them to the compost pile.

    If you are like me and hate to waste a beautiful flower, there are many ways you can utilize every last petal.

    Here are a few ideas…

    • Create dried floral wreaths
    • Make potpourri 
    • Create simmer pots
    • Dry a fresh bouquet and display it dried in a vase
    • Make flower casts
    • Create monoprints/ impressions
    • Press the flowers between the pages of a book or in a flower press, and use them to make ornaments, bookmarks, and keepsakes.
  • Fall Planting for Spring Blooms

    Fall Planting for Spring Blooms

    Do you know what time it is? It’s time to plan for spring! Many people don’t realize that to get beautiful spring blooms you need to plant bulbs in the fall.There are so many great bulbs to choose from tulips, narcissus, crocus, and more. If you haven’t done so yet, get that order in or get to your favorite garden center to purchase your favorite spring bulbs. 

    Spring blooming bulbs are planted in Wisconsin between September and November. The best planting time is after a frost, but before the ground freezes. Depending on the type of bulb or corm, a cold period below 45 degrees for 10-17 weeks is needed for proper blooming. Crocus need a shorter chilling period while tulips are on the longer end.

    Crocus

    Crocus corms are deer and rodent resistant. They come in a variety of colors including white, yellow, purple, orange, multicolored, and more. Due to their short height, they can be used to naturalize in lawns.  Their early bloom is a welcome sight after a long winter.

    Daffodils, Narcissus 

    Are you confused by daffodils and narcissus? Narcissus is a botanical name while daffodil is usually used as the common name for Narcissus. They don’t only come in yellow and white these days. They come in yellow, white, pink, orange, pink, and red. The bloom types also come in trumpet, large cupped, small cupped, double and more. They multiply over time and most are fragrant. Heights range from a few inches to 30+ inches depending on the variety.

    Tulips

    Wild tulip types multiply and spread over time. Many other types of tulips do not spread or multiply reliably however. Tulip bulbs and sprouts are loved by deer and other critters as a food source. They are often dug up and eaten or relocated by squirrels. However, the few cons of tulips are surpassed by their beautiful colors and varieties. They are available in just about any color except true blue.

    Allium

    Allium bulbs are in the onion family so they are seldom bothered by deer, squirrels, or rodents. They also range in size from 8 inches to 50+ inches. They fill the bloom gap between other spring blooming bulbs and early summer perennials. They come in shades of purple, pink, white, yellow, and red.

    Hyacinth

    Hyacinth bloom at about the same time as daffodils. For some people, the bulbs cause a skin irritation so wearing gloves when planting is recommended. To get a reliable bloom year after year, hyacinth often need to be replanted. The extra effort is worth it for the fragrance alone. Hyacinth have an intense, sweet fragrance. 

    These are just a few of my favorite spring blooming bulbs. Try Erythronium, Muscari, Fritillaria, Galanthus, Cyclamen, or Eranthis hyemalis for even more variety and an extended spring bloom. 

  • Our Hummingbird Friends

    Our Hummingbird Friends

    It is nearing the time to say goodbye to our Ruby-Throated Hummingbird friends for the season.

    They’re building up their energy reserves, so keeping your feeders full and your flowers blooming will provide much needed sustenance. As the days grow shorter, their urgency to migrate increases, making these last few weeks of their presence a special time to observe these tiny, resilient birds.

    Placing hummingbird feeders out can help with sustenance for migrating birds. Hang feeders in partially shaded areas to reduce spoilage. Feeders should be cleaned every couple of days during hot weather and at least weekly in cooler weather. Effective cleaning can be accomplished by using hot soapy water for cleaning and rinsing thoroughly. After thoroughly cleaning, refill the feeder with fresh nectar. 

    Practice responsible birding by creating homemade nectar and avoiding red dye. Homemade nectar is easy to make: simply mix four parts water with one part granulated sugar, boiling the mixture briefly to dissolve the sugar and then letting it cool completely before filling feeders.

    Fall is the perfect time to plant some natural nectar producers. Hummingbirds are attracted to red or orange tubular flowers, but will feed from a variety of blooms in assorted colors. Penstemon barbatus (Beardtongue), Salvia coccinea (annual Salvia), and Campsis radicans (Trumpet Vine), fit the bill and are some of hummingbirds favorite flowers to visit. Some Wisconsin native hummingbird favorites are Aquilega canadensis (Columbine), Agastache foeniculum (Anise Hyssop), Lobelia cardinalis (Red Cardinal Flower), and Monarda fistulosa (Wild Bergamot).

    As the season wraps up, fill your hummingbird feeders one last time. Plant some hardy perennials for natural hummingbird food for next season. Plan to add some of hummingbird’s favorite annuals to your spring annual lineup. Get your feeders back out and ready by late April to welcome back our fine feathered friends.

  • My Top 5 Favorite Fall Bloomers

    My Top 5 Favorite Fall Bloomers

    My top plant favorites usually change from season to season and from year to year. This year my favorites are showstoppers! 

    Dahlias

    My top 5 favorite fall bloomers (2)

    Dahlias can be a lot of work initially and require some patience, but when they get going they really get going. 

    The variety of patterns and color combinations are astounding. It is difficult to have just one favorite color or form. I love the ball types because they hold up well as cut flowers. Creighton Honey and Ice Tea are two of my favorites! Order your favorite tubers over the fall and winter for spring delivery and early summer planting.

    Hydrangeas

    My top 5 favorite fall bloomers (5)

    There are multitudes of different hydrangea varieties. I love the panicle types for their durability and no fuss blooms. 

    Many varieties start with green blooms in mid summer. The bloom color transitions as the seasons change from summer into fall. 

    Some of my favorites are Limelight, Limelight Prime, Little Lime, Bobo, Firelight, and Quickfire. Plant container plants in spring, summer, or fall for beautiful blooms next season.

    Chrysanthemums

    My top 5 favorite fall bloomers (3)

    Mums are not just little shrubby annuals and perennials anymore. Many of the older types are making a comeback.

    Depending on how they are pinched, many varieties are great for cutting. The blooms can vary from spidery spikes to button-like globes. With the large variety of colors and patterns, it will be tough to pin down one favorite. 

    Some of my cut flower favorites are Feeling Green, Coral Reef, and Evening Glow. You can cut them for bouquets or leave them blooming in the landscape. Either way, you can’t go wrong.

    Sedum

    My top 5 favorite fall bloomers (1)

    Most people don’t think of Autumn Joy Sedum when it comes to fall color, but this is my favorite upright sedum. 

    As a perennial this oldie but goodie really performs all growing season. The green blooms start to erupt by midsummer. The blooms slowly transition to a pretty pink, but the show doesn’t stop there! Bronze and russet tones take over as autumn continues on. The blooms can be cut at all stages and used in bouquets or dried. 

    I especially love these perennials planted in mass for a striking autumn display.

    Ornamental Kale

    My top 5 favorite fall bloomers (4)

    Another lovely fall annual that can be started by seed in spring or early summer or can be purchased as small plants. 

    Ornamental kale appreciates the cooler weather of autumn. They can even handle frost with ease.  In fact, the colors intensify as the nights get cooler.

    They also make an interesting cut flower/foliage.

  • Easy Seed Viability Test 

    Easy Seed Viability Test 

    An easy way to check for seed viability is through a seed viability test. There are several tests you can do to see if the seeds are viable. I prefer the wet paper towel test. Let’s face it, I utilize this test because it’s the easiest! If the seeds are viable, you can get an estimate on the percentage of viability for the entire pack of seeds. 

    Just follow these steps…

    • Take a paper towel and completely wet it. 
    • Place 10 seeds of your choice on ¼ th of the wet paper towel
    • Fold the paper towel over the seeds so they are completely covered
    • Fold the paper towel again so it is now 1/4th of the original size and can fit in a sandwich or quart sized bag
    • Label a sealable sandwich or quart sized bag with the name of the seed and the date
    • Place the paper towel with the seeds in the sealable bag 
    • Make sure the bag is completely closed and sealed
    • Leave the bag in an area where it will not be forgotten 

    The original seed packet will say approximately how many days the seeds take to germinate. After the required amount of days, it is time to check the seeds.

    • Open the bag
    • Carefully remove the paper towel
    • Gently unwrap the paper towel
    • Count the number of seeds that have germinated
    • Multiply the number of germinated seeds by 10
    • You now have an estimate of the viability percentage

    If you have nine seeds that have germinated, you can safely assume you have 90 percent viable seeds. In that case, you can plant as directed on the package. If you have 5 seeds that have germinated, the germination rate is 50%. You will need to sow two times as many seeds to get the same number of seedlings . Therefore, if the package recommends 1-2 seeds per cell, you should sow seeds at the rate of 3-4 seeds per cell to increase the likelihood of germination. 

    You can plant the germinated seeds as usual, being careful not to break the roots from the sprout. If there was no or a poor germination rate, you can discard the seeds before you have invested any time in planting them in your garden

  • Why Natives?

    Why Natives?

    What defines a native plant has been debated for many years. An acceptable and widely used definition of Midwest natives has been defined as those plants that grew in the area prior to European settlement in the mid-1800’s.

    Contrary to common belief, natives are not weedy plants, they are quite beautiful. When sited similarly to where they naturally would grow, they flourish. Besides their pleasing aesthetic, they provide food for birds, insects, and other animals. In other words, they help support the natural food chain. Not only do they provide sustenance, native trees and shrubs provide nesting areas and hiding spots for our wildlife. 

    Indigenous plants each have their own ecological niche in the landscape. Basically, they work together to support each other. Not only that, but many insects are host specific for their food source. Meaning that they need specific plants to survive during one or more of its life cycle stages. Each plant community provides for the needs that are important for native wildlife.

    Biodiversity is vital to create a more resilient habitat. The use of natives leads to sustainability and lower maintenance needs. Natives seldom require fertilization and once established they require less watering. Local plants are quite simply built to thrive in their native environment. 

    One of the most common requests for a landscape plant is for the plant be easy to maintain. What is easier than a plant that was here before human intervention? With over 1800 Wisconsin natives to choose from, there is something for everyone!

  • The Pesticide Label

    The Pesticide Label

    It is important to read the pesticide label and have an understanding of what you read if you choose to use any type of pesticide. If you do not understand the label, you should not use the product. The label should be read when you are purchasing the product to make sure you are choosing the best product for the intended use. It is critical to read the label before you store the product as well to ensure that you are storing it correctly.  To ensure you are safely applying the product at the proper rate and using the correct safety precautions you should also read the label before you use the product.

    The label contains important information including the trade name, the type of pesticide, formulation, ingredient statement, safety information, and storage and disposal information. You should make sure to take a look at the trade name of the product as well as the active ingredients. Keep in mind that products can be similar, but have different intended uses. The type of pesticide is listed on the label as well. This indicates what pest the product controls. Safety information is also on the front of the label and tells you the level of toxicity. All pesticide products carry a “Keep out of the reach of Children” warning on the label. They will also be graded according to the level of toxicity and range from “CAUTION” to “POISON”. Other safety information lists the appropriate personal protection equipment you should wear when applying the pesticide. Environmental information is indicated on the label to educate about precautionary measures to protect nontarget organisms. 

    Although it may seem like the label may seem like an unnecessary read, the label is created to keep users informed and safe. Formulations and information may change over time. Don’t assume just because you have used a product for several years that it is not necessary to read the label. It is important to keep yourself, your children and pets, and the environment safe by using products as directed.